Thursday, June 21, 2012

Summer Time

It is June 21st which marks the first day of summer!
May your warm days be filled with sandy toes and salty kisses!


1//2

Inspiration

Hello there. Today I have been busy searching for inspiration. I've been asked to help a friend with her wedding decor and I am now on the hunt to make the perfect inspiration board. I have spent ours on Green Wedding Shoes, Pinterest, Style Me Pretty, Anthropologie and Google. I am quite excited about this wedding and when I am done I will share my inspiration board with you all.

Until then here is a photo from the Sartorialist with a little inspiration for your outfit tomorrow. Enjoy!


Monday, June 18, 2012

Fathers Day Sweets

Happy Monday! I hope you all had a lovely weekend and spoiled all the wonderful dads in your life! Today I am going to share a recipe from Joy the Baker that I made for my papa last night. When he told me he wanted twinkies I was quite offended. I had offered to make him any dessert he wanted and he said he wanted twinkies!? That is typical dad, so twinkies is what he wanted and twinkies was what he would get. After searching the internet I came across this delicious recipe and started making my homemade fathers day dessert. The outcome was wonderful and the family couldn't stop talking about it. And the best part... it was quite easy to make!
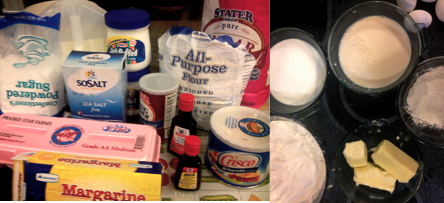
Twinkie

2 cups all-purpose flour
3 teaspoons baking powder
1/4 teaspoon salt
10 Tablespoons unsalted butter, softened
1 cup sugar
2 large eggs
1  teaspoon vanilla extract
1/8 teaspoon almond extract (optional)
1 cup milk

Put a rack in the center of the oven and preheat oven to 350 degrees F.

Sift together flour, baking powder and salt into a bowl.  Set aside.

Beat together butter and sugar in a large bowl with an electric mixer at medium-high speed until pale and fluffy, about 3 minutes.  Beat in eggs one at a time, beating for 1 minute in between each addition.  Beat in vanilla and almond extract.  Reduce speed to low and add flour mixture alternately with the milk in 3 batches, beginning and ending with the flour mixture and beating until just incorporated.


Spray prepared Twinkie tins with nonstick spray and divide the batter between the cups.  Bake at 350 for 15 minutes, or until the cakes are just slightly golden and a pick inserted in the center of the cakes comes out clean.  Remove from the oven and let cool completely before filling with marshmallow cream.

Twinkie Cream
recipe from Todd Wilbur
2 teaspoons very hot water
1/4 teaspoon salt
2 cups marshmallow cream (one 7-ounce jar)
1/2 cup shortening
1/3 cup powdered sugar
1/2 teaspoon vanilla extract
Combine the salt and the how water in a small bowl and mix until the salt is dissolved.  Let the mixture cool.
Combine the marshmallow cream, shortening, powdered sugar and vanilla extract in a medium sized bowl and beat with an electric mixer until fluffy.
Add the salt solution to the filling and beat to combine.


Next pipe the mixture into the cakes. Joy uses a pastry bag but I had to get creative. I had a medicine syringe and that worked just fine. Now its time to eat! Add some strawberries like I did or package them up in bags for friends. Just make sure you make enough, everyone will want seconds!
To find more delicious desserts from Joy the Baker click here.

Saturday, June 16, 2012

DIY Gifts: Framed Memories

Happy weekend everyone! Today I have my first DIY post. With graduations and parties I figured this would be a perfect time to share an easy but perfectly cute gift idea. Its great for grads because they can use it to spruce up their new office, classroom or wherever their career takes them.
So enough chat, here is my creation of framed memories:


I made this one for my best friend Kate and she completely loved it! Heres what you will need...

  • an old frame ( you can buy one at the goodwill or find one around the house)
  • a can of spray paint (color your choice)
  • ribbon/twine/lace
  • clothes pins
  • pictures and other decorative accessories
  • a hot glue gun


Now the fun begins!
First clean the frame and then spray paint it. Once the frame is dried grab your ribbon/twine/lace and glue to the back of the frame. You can decorate the inside any way you'd like, adding more ribbon than I did or less. Just be creative! Next add your own personal touch. Write a note or put on a few 
     pictures and voilĂ ! You have the perfect grad gift!

Have a wonderful weekend

Friday, June 15, 2012

Back Again

Hello all!


So it has been quite some time since I have been on here. I greatly apologize but I was in a bit of a blog slump, and we all know that blogging in a slump is never a good idea. I took a step back and now I am ready to jump in again. After much thought I've decided to give this thing mini makeover. Yes fashion will still be implemented but so will DIY projects and other such things I enjoy. Hopefully as well as you!

 I'm kick off my rebloging with a little nail fun.

Glitter is back in for the summer and the fourth finger is out. So if you want to get a little creative try painting the thumb and index a different color. You can choose a bright shade to make it stand out or simply add a little glitter for a subtle look. Whatever you choose have fun and make it your own!
Check back in tomorrow for a DIY project you wont want to miss!
Happy Thursday everyone!